Our website contains links to partner sites. If you click from our site to the partner's site and purchase their services there, we will receive a commission for mediation (Find out more information). This form of cooperation does not affect the objectivity of our reviews. With each purchase made through links from our site, you support our editorial office so that we can create quality and useful content in the future. Thank you.

Review: Cloudways modern managered cloud hosting
Cloudways is a modern hosting company whose approach to hosting is diametrically different than we were normally used to. Cloudways itself does not care about server infrastructure on the technical side, you rent servers directly from top global server hosting providers such as Digital Ocean, Amazon AWS and Google Cloud Platform. Cloudways takes care of installing and managing servers (regular system and security updates, configuration, optimization) and last but not least provide you with simple and clear administration interface, thanks to which you have everything you need to manage your server in one place.
I see the advantage of this service mainly in smaller projects and teams that do not have enough human capacity, knowledge and finance for an internal server manager. Thanks to Cloudways, those teams can leave this part up to the professionals, devote themselves to the core of their business and, if the app grows, they can easily scale their services. The advantage is that despite everything, you have full access to the server, and more experienced users can install or configure whatever they want. And if you were to get into narrow, there is a great knowledge base full of detailed how-to guides. In the worst case, technical support is available via chat 24/7/365.
So let’s show you how simple it is to configure a server and migrate a WordPress app from another hosting.
Cloudways tutorial on how to migrate to cloudhosting
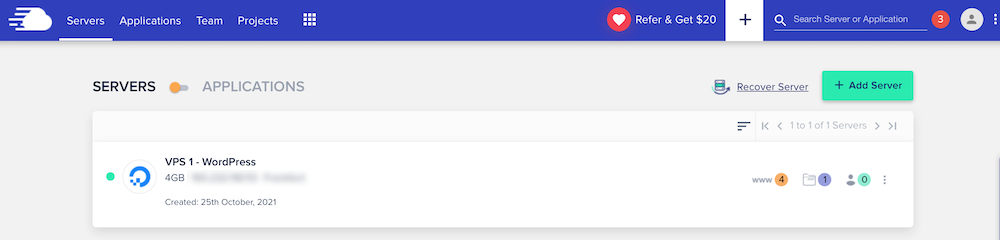
Creating a server
In the main menu we click on Servers. The Add Server button appears on the right below the main menu.
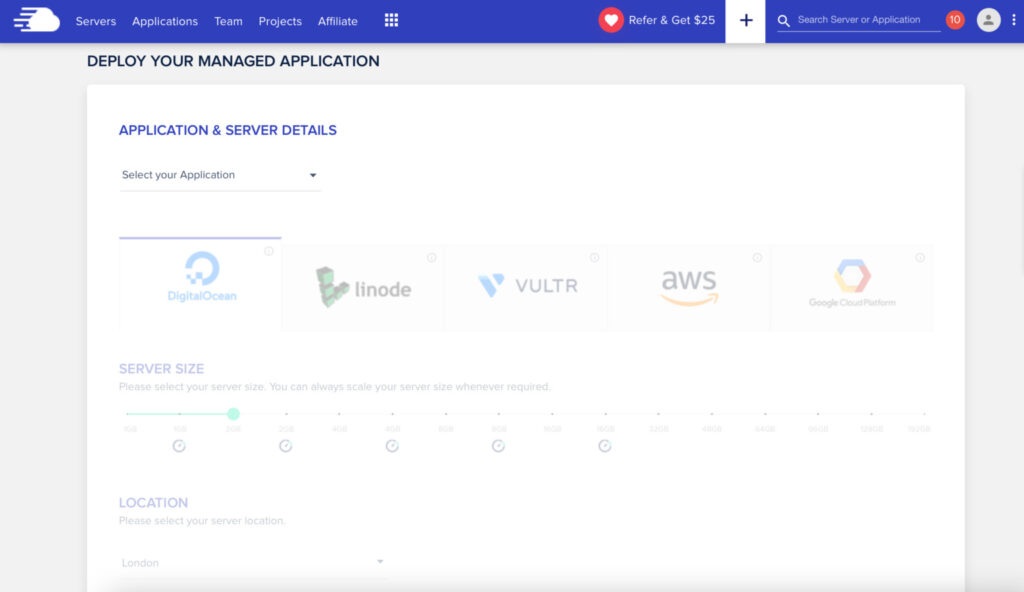
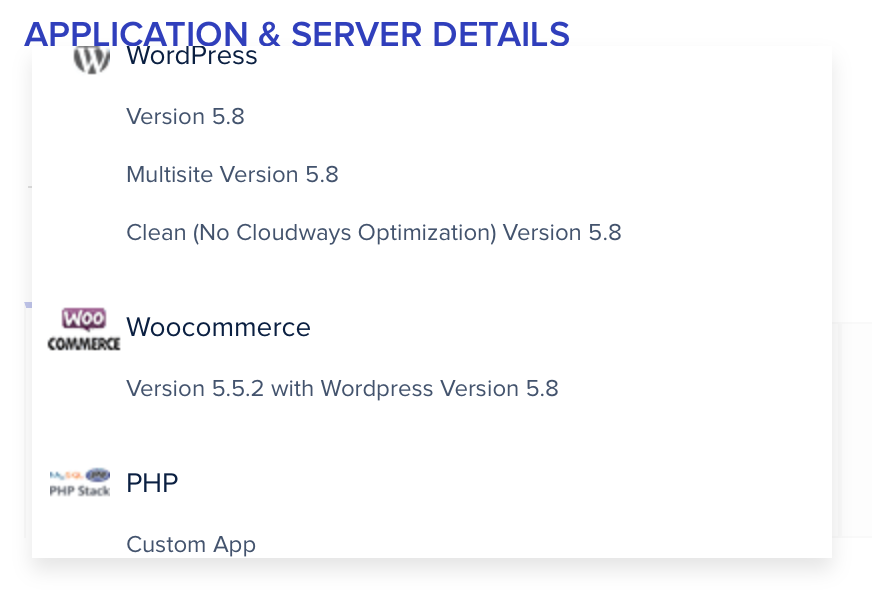
First of all, you need to choose the type of application for which you plan to use the server. Of course, you can run different applications on the server later, but when you install the server, you need to choose one preferred type of applications that you want to host on the server. This is mainly because Cloudways has pre-built images for installations that are optimized for the application. For example, extra optimization for WordPress applications and so on. You currently have the option to choose from these types of applications:
- WordPress
- Latest version of WordPress with Cloudways Multisite optimization
- WordPress
- Current version of WordPress without optimization
- WooCommerce + WordPress (current version)
- Tailored PHP Applications
- Laravel application
- Magento app
After selecting the type of application, you need to fill in the name of the server itself and assign the server under the project.

In the next step, you need to choose the server provider. You currently have a choice of quality servers:
- DigitalOcean
- Amazon AWS
- Google Cloud Platform
After selecting the preferred provider, you need to choose the appropriate server configuration. This section varies according to the choice of the preferred provider, each of them offers slightly different configurations. Of course, prices also differ.
In our case, we chose Digital Ocean as a provider and a server with 4GB RAM, 2xCPU, 80GB NVMe and we chose a datacenter in Frankfurt, Germany as the server location. Location should be considered according to what markets you want to target, ideally as close to your customers as possible. If you are not sure about the appropriate server configuration for your application when ordering a server, there is nothing to worry about. If necessary, you can increase your hardware resources as needed at any time in a few minutes and with a few clicks , without having to contact support.
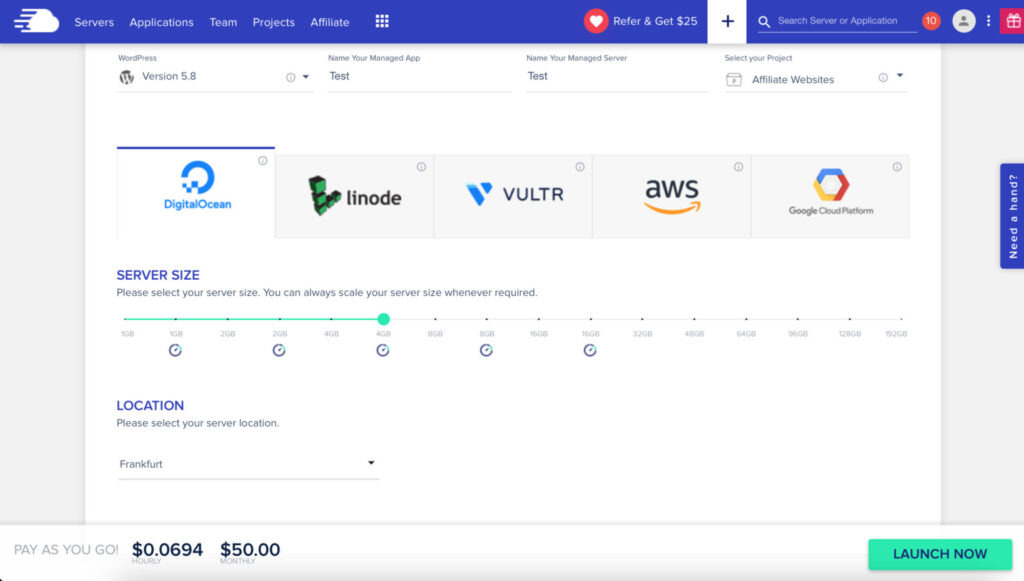
The estimated monthly price per server will be displayed at the bottom of the screen. If you are satisfied with the configuration, click Launch Now and within a few minutes your server will be ready. And you can embark on installing the first application.
Creating an application
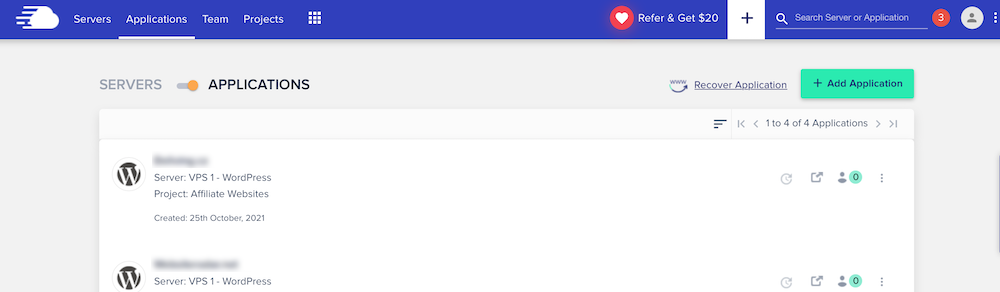
When you finally have a server ready, you can start building applications. Creating a new app is a matter of a few clicks. So we’re going to go over it gradually.
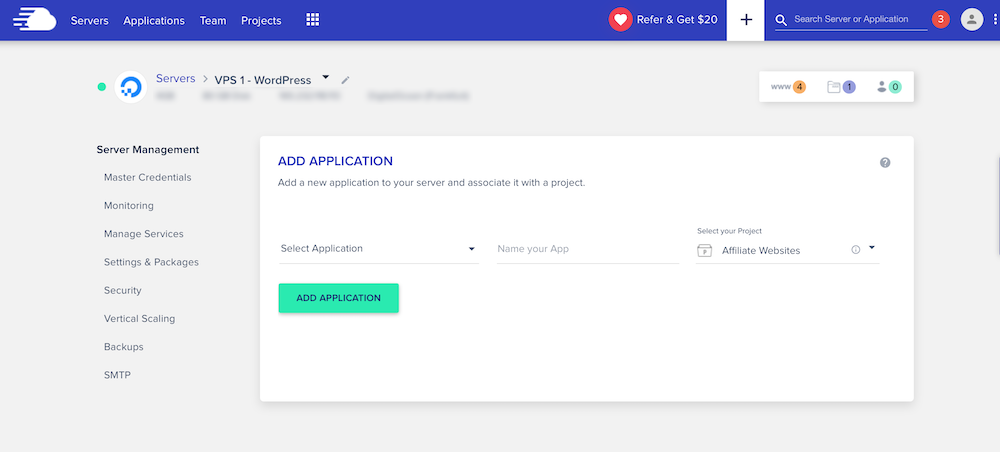
In the main menu, tap on apps and you will see a list of apps hosted on Cloudways. To add a new application, we click on the green button Add Application.
In the next step, we need to select the server we want to physically place the application on.
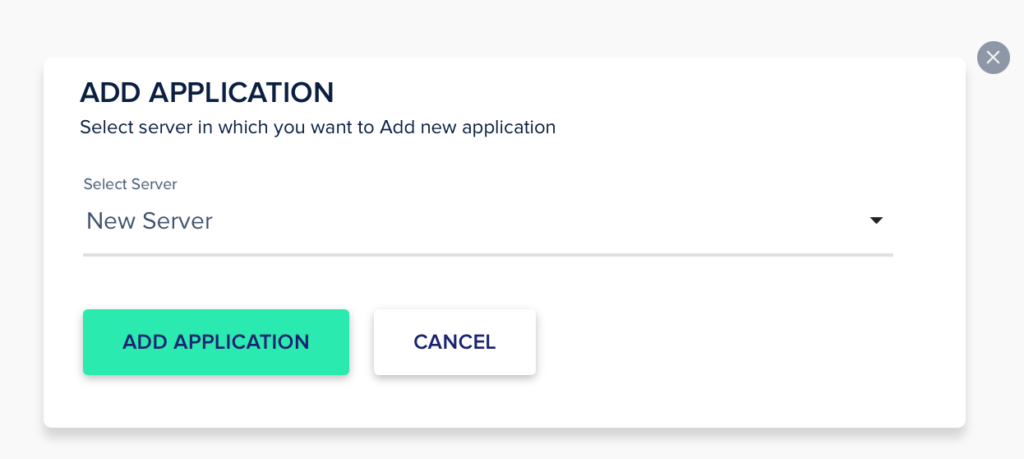
After confirming the selection, we are presented with a form where we need to configure the basic properties of the application. Application type. Here you can choose from supported types:
- WordPress Applications
- WooCommerce app
- PHP Applications
- Laravel application
- Magento app

In our case, we will select the WordPress application. Fill in any application name and assign the application to the project under which you want to keep it, so that other members of the project can access it.
The form looks like this when completed:
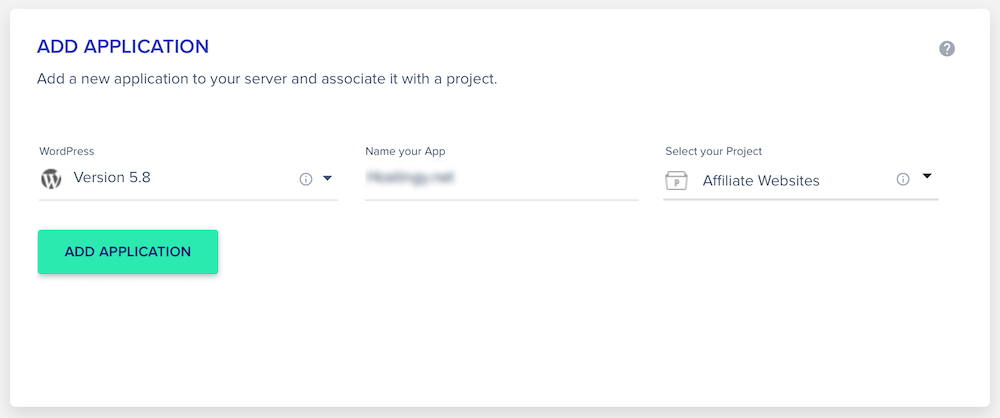
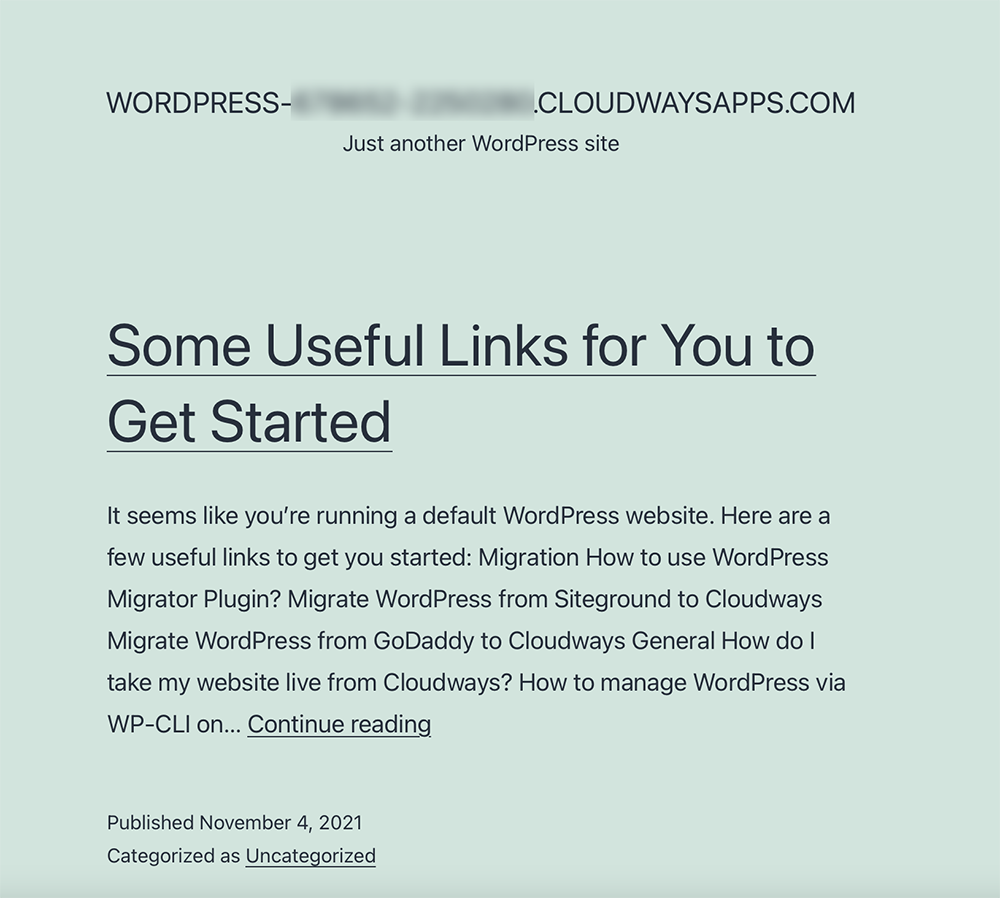
Click the green Add Application button and wait a few minutes for Cloudways to prepare an application with a clean installation of WordPress. We have a clean installation of WordPress ready in no time, as can be seen in the image below.
Simply migrate your WordPress website or WooCommerce e-shop to Cloudways
Now let’s look at how simple and painless it is to migrate an already existing WordPress project of any size from any host/server to our new server at Cloudways.
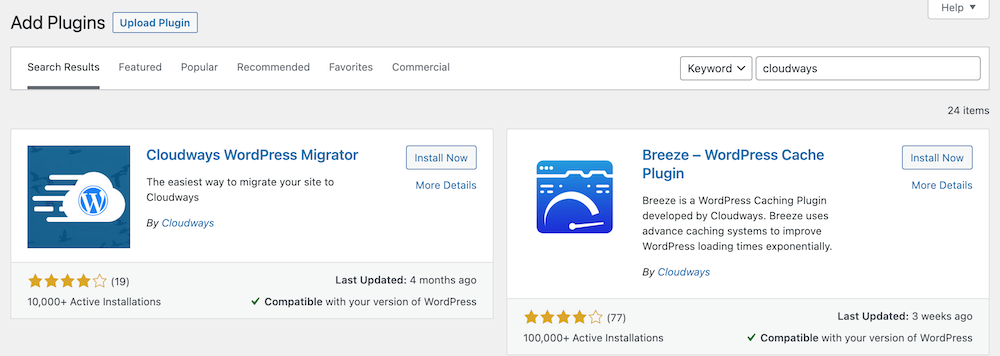
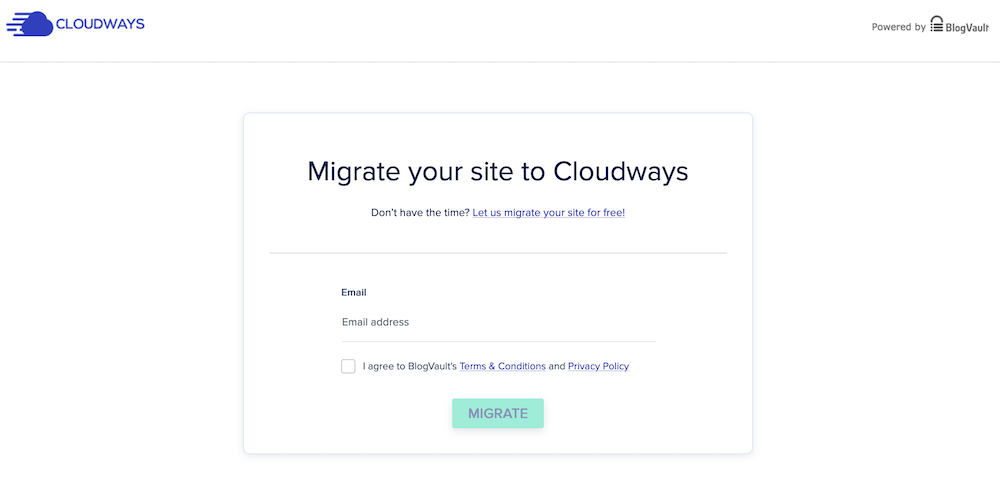
Cloudways has the Cloudways WordPress Migrator plugin available for this purpose in the WordPress repository. Just install this plugin on the site you want to migrate, activate it and then fill in a simple configuration form with the data needed for migration.
After activating the plugin, go to Cloudways Migrate in the left administration menu. After clicking, you will see an introductory form where you need to enter your email, under which you have a Cloudways account. Confirm your agreement to the Terms and Conditions and click the Migrate button.
The next step follows the migration configuration itself. All data needed for configuration can be found in the application detail in your Cloudways account.
- Application URL
- Public Server IP Address
- Database name
- SFTP Login Username
- User password for SFTP login
If you don’t have an SFTP (or SSH) account based on your app, you can simply set up one. Just fill in the desired username and password into the corresponding fields in the Application Credentials section, and then click Add. And thus you have an account created.
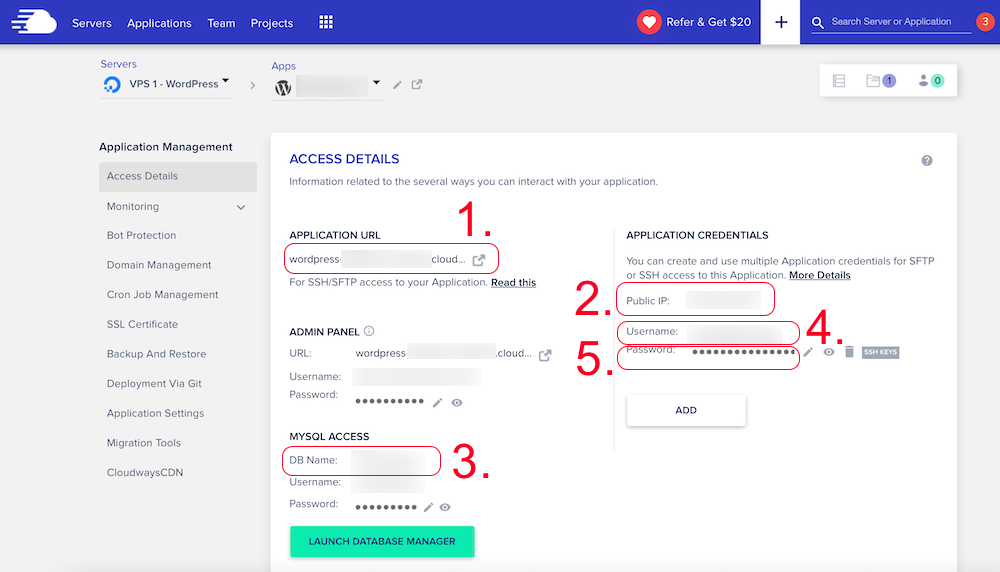
Now you just need to copy the required data from the application detail into the configuration form for migration. For copying, you just need to click on the desired box from which you want to copy the data in the details of the application.
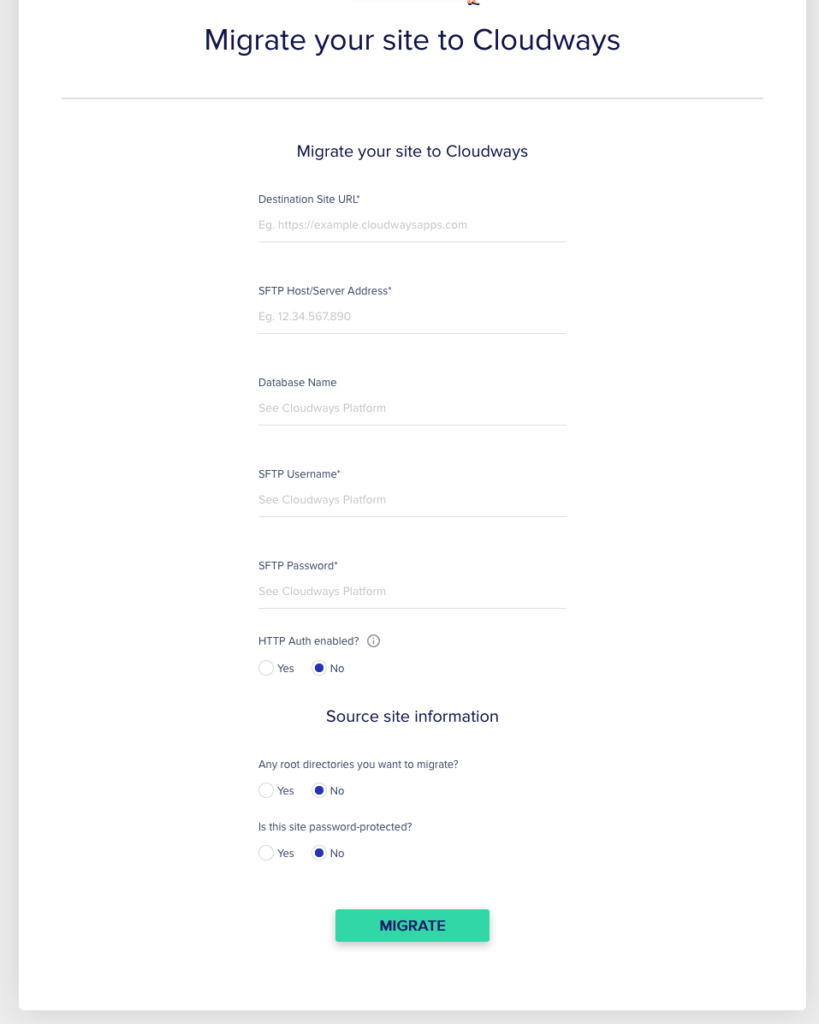
The form still contains several settings that we will explain.
- HTTP auth enabled? —if you do not have password-secure access to the website, leave this setting set to No.
- Any root directories you want migrate? —if you have some custom folders on FTP outside the WordPress installation that you also want to transfer during migration, click Yes to select which folders to migrate.
- Is this site password-protected? — if you do not have password-secure access to the website, leave the settings at No.
Thus, we have everything necessary set and we can start the migration by clicking on the Migrate button.
Subsequently, the completed data will be verified on the Cloudways side. If there is no problem during the inspection, the migration itself will begin. This takes minutes to tens of minutes, depending on the size of the site and the connection.
After you start the migration, you will see a screen with the migration status, you can either wait for the migration to complete, or you can close the screen and wait for the notification email, which will be send to you after the process is done.

When the migration is complete, all you need to do is assign a 2nd order domain in Cloudways and point DNS domains to your Cloudways server. We will see the domain configuration in the next section.
How to set up a domain for a website?
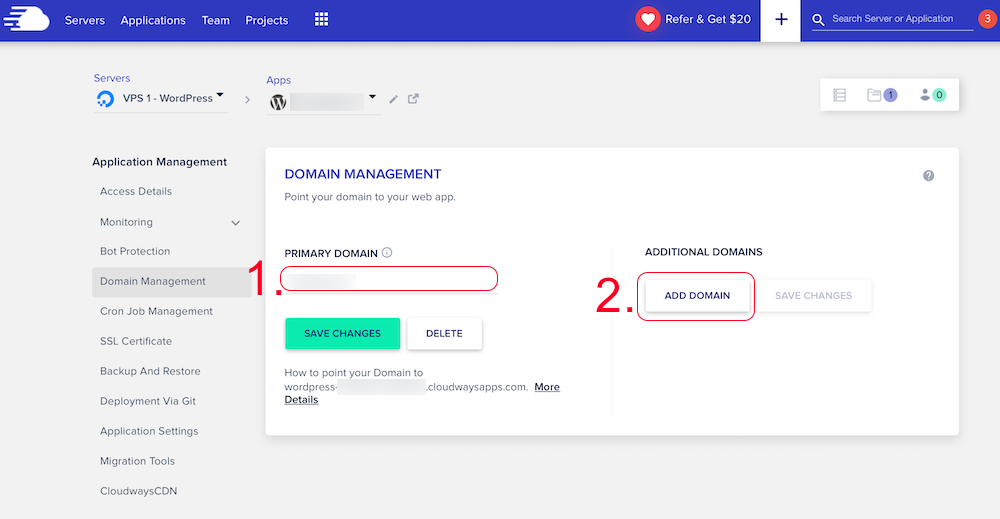
To assign a 2nd order domain for our application, we need to go to Cloudways under the administration of the application and select Domain Management in the left menu.
- For example, we will add example.com as the primary domain for our website.
- If we want to use domain alias for the site, we can assign these in the section Additional domains.
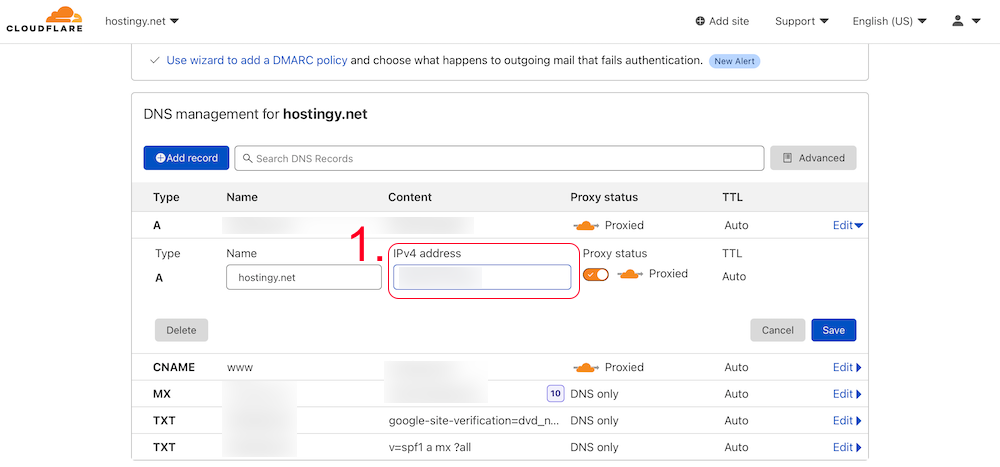
Now we have everything necessary set up on the Cloudways side and you need to direct DNS records for domains to the IP address of our server. The public IP address of the server can be found in the details of the application under the tab Access details (we showed it when configuring the migration), look for Public IP.
In our case, we use Cloudflare, so we just need to point A DNS record to the IP address of our server for a domain in Cloudflare and we have the website available on the specified domain within a while. In case you are changing DNS records directly at the domain with your registrar, count on it taking a couple of hours for the DNS changes to take effect.
And that’s it. We have our WordPress premigrated on our new server from DigitalOcean, whose management and updating is taken care of by Cloudways itself. If the project has grown and the current server is not enough for us, it is not a problem to increase performance at any time within a few minutes without the need to migrate to another server or changes of provider.
Conclusion
I have recently started actively using Cloudways for my own projects and I must say that I am just pleasantly surprised so far. I’ve hosted apps on dozens of services over my years in the industry, but this one is definitely one of the best I’ve encountered.
I see the great advantage of Cloudways mainly in the fact that if you are an individual or smaller team and have a more demanding application or a large number of small projects, you no longer need more extra man for server management, as Cloudways largely takes care of everything you need (regular OS and package updates, correct configuration and security of your servers).
The great thing is that you can choose top servers for your applications from cloud solution providers such as Digital Ocean, Google Cloud or Amazon from one interface. It is also great that if your business grows, you can simply scale the servers as needed and literally spend it in a couple without the need to contact support.
And what I can’t forget is the overall user experience. Setting up a server, adding an application, remigrating an already existing application on a server under Cloudways is extremely simple compared to how I’m used to with other providers. If you need your own server, but you don’t want to spend hours with configuration and constant updates, I can definitely recommend Cloudways, I’m convinced that you won’t sorry.